Good Morning Magnolia Dies Blossom.
by Carolyn Rakowski
Let Start at the very Beginning.
This is what we are aiming to make: These Magnolia Blossom are my idea of this beautiful blossom.
I used The Shimmery White Card stock.
Garden Green Card Stock for leaves (or any green you make like with your Magnolia's)
Crushed Curry Card Stock. (Small Piece)
You can either use a Stamp Pad for your Palette or use one of your stamp blocks with dye ink or water colour to add colour to your blossom.
Tomboy or PVA Glue.
Tomboy or PVA Glue.

1. In the Magnolia Die Set you will notice there are many dies to make this blossom with.
I have chosen 5 of the dies to use. (The dies are the shape of the layers above.)
Largest 2 petal die. Cut 2.
Medium size petal die. Cut 2
Small centre petal die. (this one has embossing on it as well around the centre of the petals) Cut 1.
Large and Small Stamen cut two of each.


2. The Petals I painted the same it is your choice of colour what you chose but I choose Lovely Merlot. I used my Aqua Painter Brush the medium sized brushed. Applied ink to lid of my stamp pad or also you can add colour to a stamping block and use this as your Palette. I used long Strokes from centre down to the tip of the petal. Add as much colour as you would like to make it like the blossom you are portraying. Leave Petal to dry then turn over and paint the back side of the petals and leave to dry. Do not start shaping your petals until they are completely dry.

3. This is the largest Petal Painted and shaped. I also cut down between the petals to help the petals to round after I have shaped them.
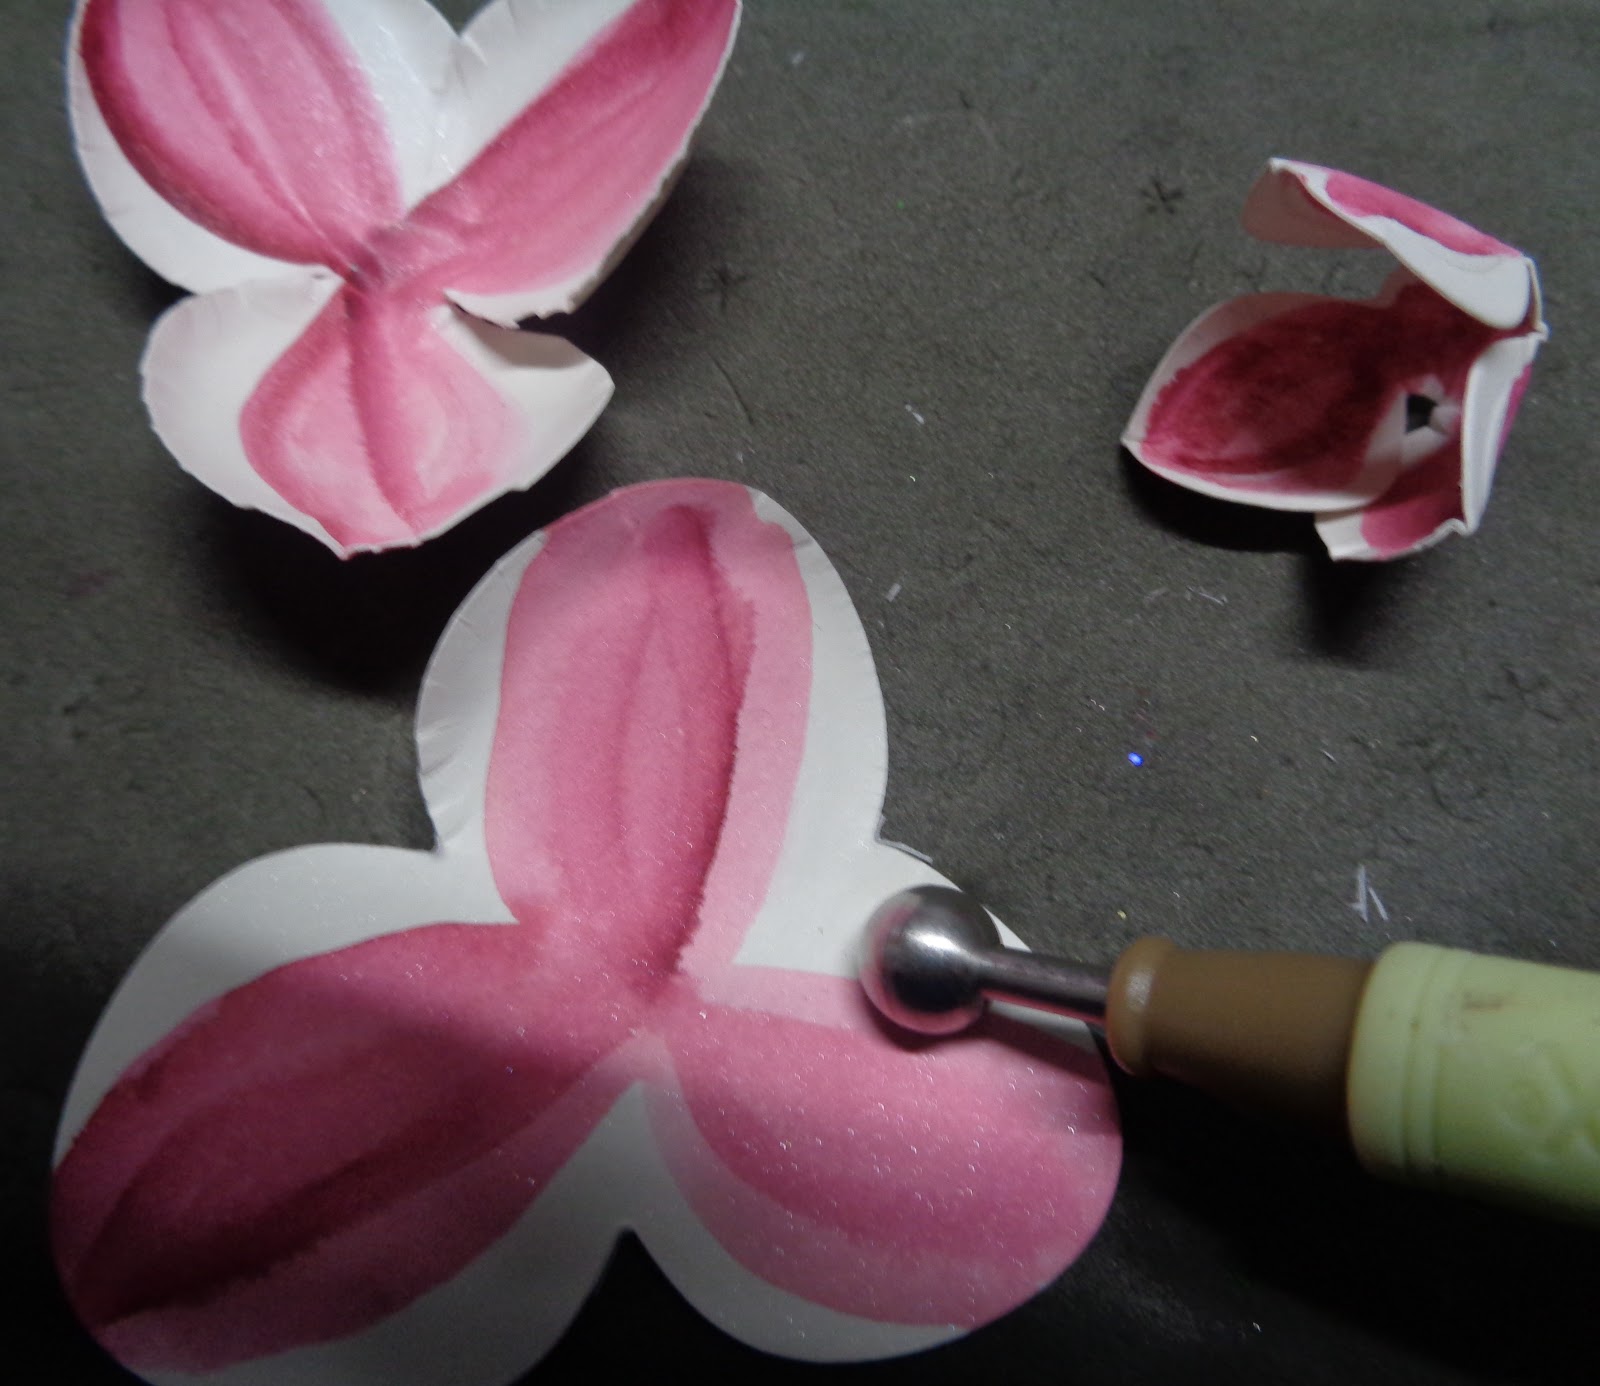
4. This is how I shape my petals I use a circular motion all around my outside of my petals with quite a heavy impression. As I do this the fibres in the paper are crushed and I am able to make a rounded shape. Through the centre of each petal I use a strong long stroke to enable the petal to shape into a V or U shape.

5. After I have rounded the petals I cut down to almost centre of flower next to each petal and pinch the leaves with my thumb and fingers to give a rounded V shape.

6. Then I start adding each layer of Petals to the base layer. Alternating the Petals on top of each bottom Layer. I use Tomboy here as it is a good strong glue but use it sparingly as you do not want your flower to be sticky.

7. I then take the Stamen and use one of the large stamen as the base. I use my embossing tool with a circular motion in the centre and round the stamen up into a half circle as the base. I take the tweezers and manipulate the stamen to how I want them and place them inside the cup with a a little adhesive which is added to the centre of the Magnolia.

8. I then take my tweezers or my quilling tool and roll the sides of the petals how I want them to sit.
9. This is the way I make my Magnolias. I also added some Wink of Stella onto the centre of the petals to add a little more sparkle to your flower petals.

I hope you enjoy making this flower. My flower making gives me many hours of pleasure, and relaxation, It is also very stress releaving.
Would love you to leave a comment and let me know if I have missed anything or that all is ok.
Have a great week Crafting
love Carolyn
No comments:
Post a Comment